

The Plugin Packs are designed to quickly and easily automate the configuration of items to monitor and expand checks by delivering useful information to the IT operational team – even if you are a beginner.
Since Centreon 3.4 (latest open source version), 6 Plugin Packs are available free of charge: Cisco Standard, Linux SNMP, MySQL DB, Printer Standard, UPS Standard et Windows SNMP.
However, the catalogue contains several more Plugin Packs. Let’s take a look at how to use one of these Plugin Packs to deploy ESX server monitoring for your VMware virtualization platforms.
Description
The Plugin Packs catalogue allows to monitor a VMware infrastructure for v4 or v5/v6 version. In this example, we will monitor a v6 infrastructure using the “VMware ESX” Plugin Pack.
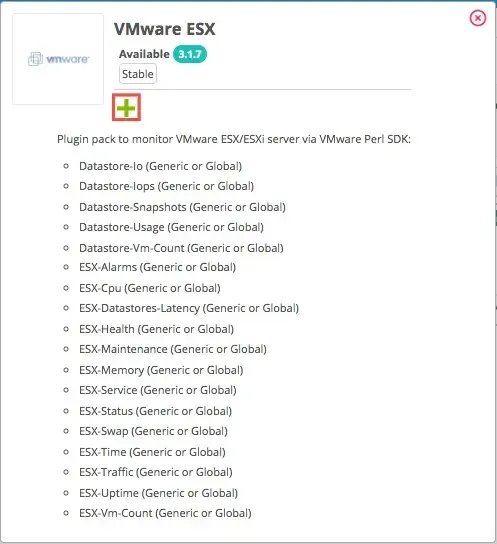
This Plugin Pack provides following indicators:
- Datastores: I/O, snapshots status, usage rate, number of virtual machines
- ESX server: alarms, CPU / memory / swap usage, datastores latency, global health, maintenance status
This Plugin Pack needs an account to access to vCenter ESX server API. Your account needs full properties read rights.
Plugin Pack installation
In the “Configuration > Plugin Pack” menu, search “VMware”:
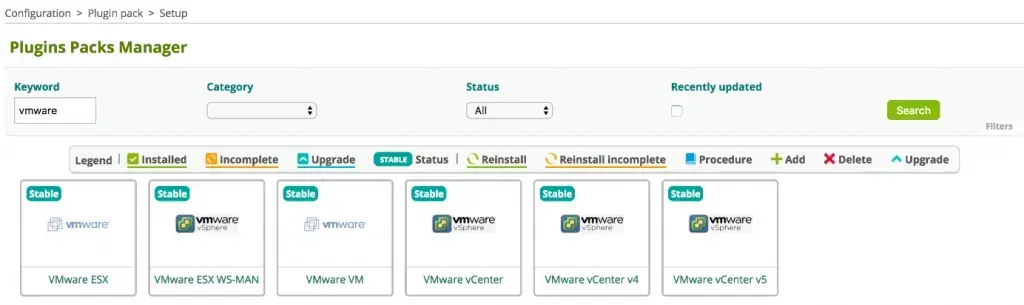
Click on ”VMware ESX” pack, then on install icon:
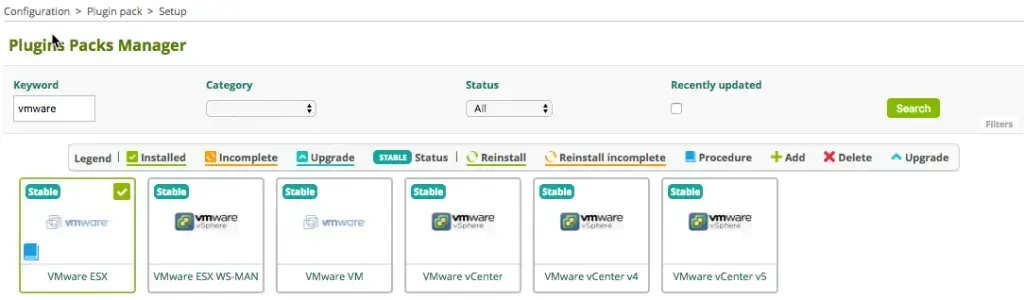
The Plugin Pack is now installed:
Plugin Pack settings
Click on monitoring procedure (blue book icon):
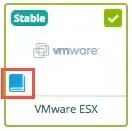
This procedure describes that we need to install on poller:
- “centreon-plugin-Virtualization-Vmware2-Connector-Plugin“ plugin
- “centreon-plugin-Virtualization-VMWare-daemon” connector
Notice: the connector allows to keep a connection to the vCenter or the ESX server to collect data.
We need to configure this connector as describe in the monitoring procedure and start it:
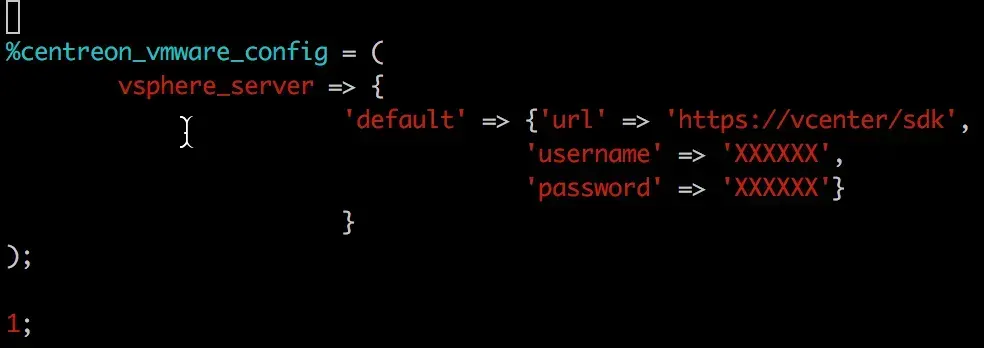
The connector configuration file allows to describe several servers. In this case, we will configure during deployment of configuration which server to connect.
To test your configuration you need to start the connector and execute the following command:
# /usr/lib/centreon/plugins/centreon_vmware_connector_client.pl –plugin=apps::vmware::connector::plugin –container=default –connector-port=5700 –connector-hostname=localhost –mode=getmap
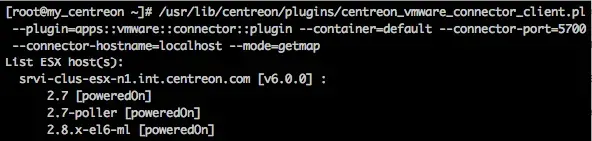
The list of available ESX servers and linked VM must be present.
Plugin Pack deployment
The first monitoring deployed will be the state of ESX server itself. Go to “Configuration > Hosts” and click “Add”. Select “virt-VMware2-ESX-custom” template and filled mandatory fields. Then click “Save”:
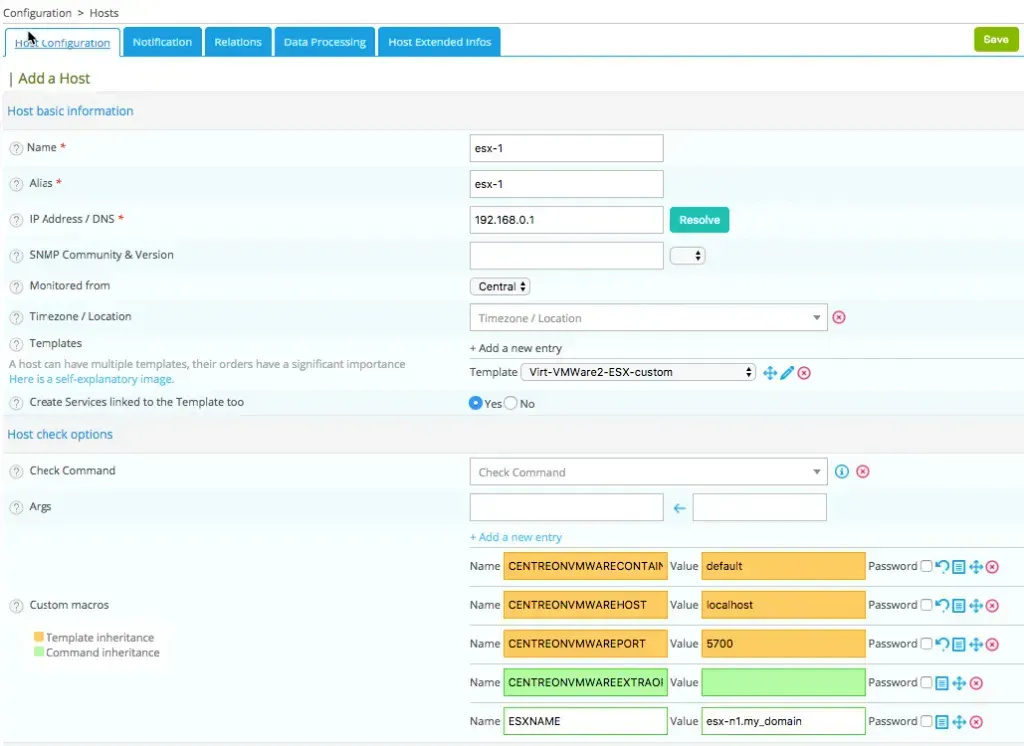
Once the form saved, Centreon created automatically several indicators to monitor to this ESX server.
Extend configuration
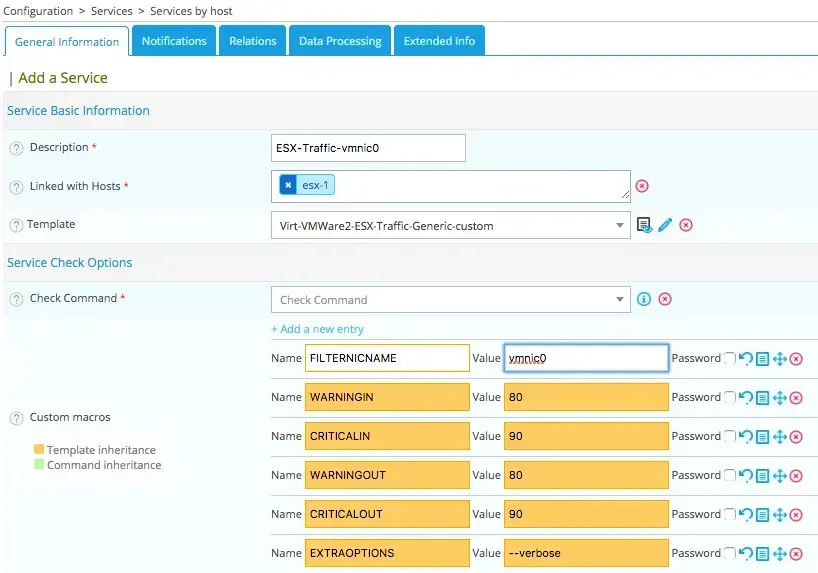
Some indicators can’t be deployed automatically because they need additional information like the name of the network cards.
Add a new service, define name, select template and host to link this service. Only the name of the network card must be filled if you agree with predefined options:
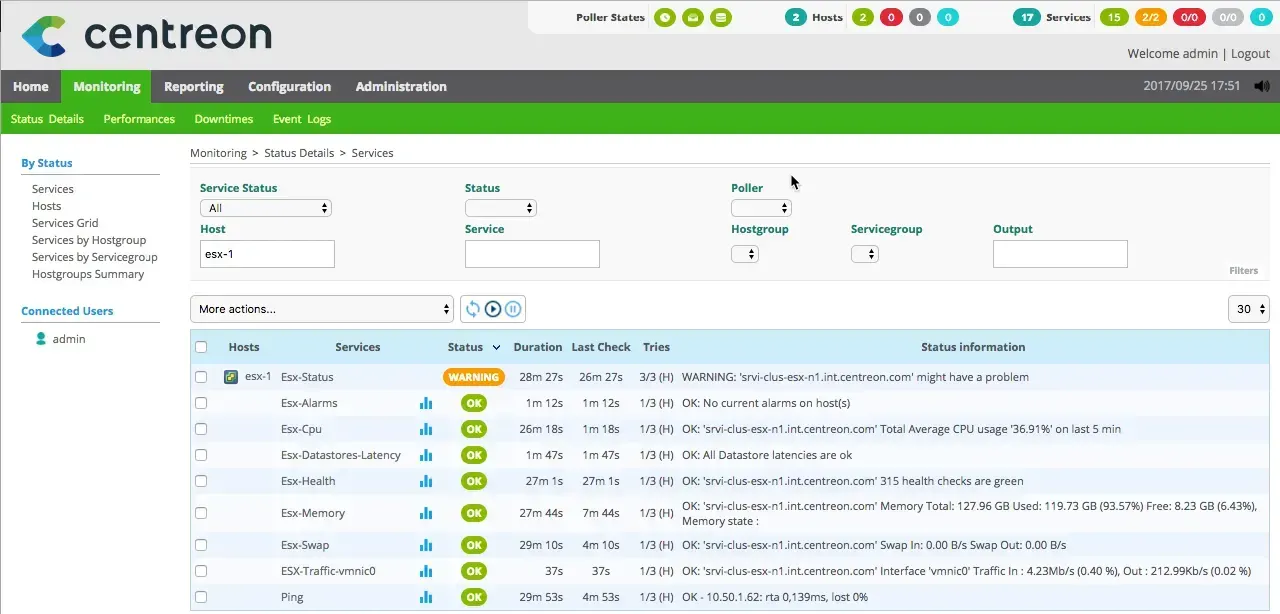
The result
Generate and export this new Centreon configuration. You will see in the Centreon web interface the result once the indicators will be check:
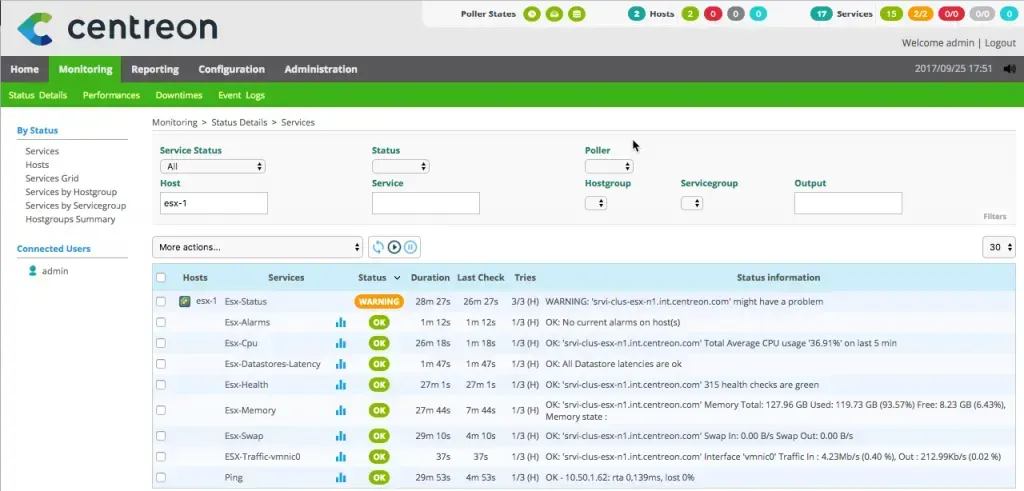
And in a few minutes, the monitoring of the VMware server has been deployed and is operational. All that remains is to deploy the other Plugin Packs to monitor the other equipment and applications of your information system.
How can you get the Plugin Packs?
To test our Plugin Packs you can download Centreon 3.4 with its 6 native Plugin Packs or choose the Free Trial of Centreon IMP including 5 additional Plugin Packs.
Interested by “VMware ESX” Plugin Pack? Two possibilities!
- If you are a SMB with a small ITOM team and budget: buy Centreon IMP with online subscription.
- If you are a Multi-sites I&O with bigger ITOM team: contact us to buy our product Centreon EPP, also included in Centreon EMS.
Also read: